Installing and using VyOS (on VirtualBox)
Disclaimer and notes
This is not an official guide. I do not, and I cannot, guarantee that anything you read on this page is error free or even works at all. I cannot guarantee that these instructions do not set your computer on fire. There is no warranty at all. Proceed at your own risk. Never try any of these on a real production machine, always test everything in an isolated testing environment first. You have been warned.
Also, despite the title, most of these are not VirtualBox-specific. Most of these do work in standalone installations done on physical computers.
These instructions have been written and tested using:
- VyOS 1.1.0/1.1.6 (Helium)
- VyOS 1.0.2 (Hydrogen)
And due to VyOS's heritage, also these:
- Vyatta Core 6.6R1
- Vyatta Core 6.5R1
VyOS is a forked copy of the old Vyatta Core router distribution that was created in late 2013 after Brocade closed off the source tree. Everything here should work in both systems. Because Vyatta Core no longer "officially" exists, I don't explicitly mention it by name beyond this point, but instead refer to both VyOS and Vyatta Core as "VyOS".
It is very likely that I will soon remove all references to Vyatta Core (beyond the forking) from this page.
Some notes about the VyOS system
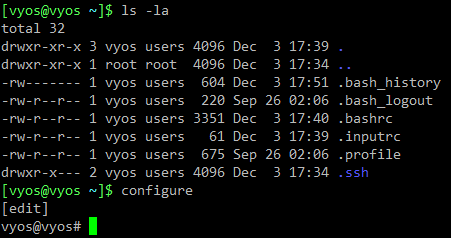
VyOS is a heavily customized Debian-based Linux distribution. As long as you configure the sources first, you can install almost any package on it using apt. After logging in, what you see is a normal Linux command line prompt. Type ls -la and see it yourself. If you want, you can change the default prompt and even use colors:
You can even run many normal Linux commands if you run them as root (sudo is enough). ifconfig does not work under the vyos account, but it can be run under root (or with sudo). Similarly, the ip command works with sudo, if you prefer it instead of ifconfig. As of version 1.1.6, systemd does not exist in VyOS.
Everything in VyOS is configured through the main configuration file named /config/config.boot. You can edit it with vi or nano. The shell in VyOS is called vbash ("Vyatta Bash" I guess) and its autocompletion system has been modified to work with all the commands and parameters available in the whole system.
The new VyOS wiki is available at http://vyos.net/wiki/Main_Page. It is the preferred source for all information; it also contains further links to support forums, bug tracker and other useful places.
The old unofficial Vyatta Core wiki is still available through Internet Archive, should it be needed for something.
It is not, however, required to understand how the system works in order to use it, but it helps.
Restoring "lost" network interfaces after cloning
If you clone an existing VyOS installation and reinitialize the MAC addresses of the interfaces, you'll end up in a nasty situation. The system identifies the interfaces by their MAC addresses and now when you boot up the clone, the hardware has changed and it no longer finds the interfaces. To fix this, you have to edit the file /config/config.boot and fix the addresses.
Here's an example of what I am talking about. Suppose you have your router up and running and all configured like this:
vyos@vyos:~$ show interfaces
Codes: S - State, L - Link, u - Up, D - Down, A - Admin Down
Interface        IP Address                        S/L  Description
---------        ----------                        ---  -----------
eth0             192.168.0.1/24                    u/u
eth1             192.168.1.1/24                    u/u
eth2             192.168.2.1/24                    u/u
eth3             192.168.3.1/24                    u/u
lo               127.0.0.1/8                       u/u
                 ::1/128
vyos@vyos:~$
But then you clone it, or change the MAC addresses in VirtualBox's settings. When you boot up the clone, it will look something like this:
vyos@vyos-clone:~$ show interfaces
Codes: S - State, L - Link, u - Up, D - Down, A - Admin Down
Interface        IP Address                        S/L  Description
---------        ----------                        ---  -----------
eth4                                               u/u
eth5                                               u/u
eth6                                               u/u
eth7                                               u/u
lo               127.0.0.1/8                       u/u
                 ::1/128
vyos@vyos-clone:~$
See the "new" interfaces? eth4, eth5, what? And the IP addresses are gone! Not good. The good news is that your old interfaces still exist and their configurations are intact. It's just that their MAC addresses (the hw-id values in the configuration file) are wrong and VyOS no longer recognizes them. It has helpfully created new items in the configuration file for the "new" interfaces.
This problem is well-known and several solutions exist (links verified in January 2016):
- https://github.com/vyatta4people/Vyatta-Clone-Helper
- http://www.vyatta4people.org/vyatta-clone-helper-created/
Automatic
You need to install the Perl script on the system before you clone it. Place the Perl script in the directory /opt/vyatta/config/etc and add its name (with full path) at the end of the file /config/scripts/vyatta-postconfig-bootup.script.
Note that the script will slowly fill the hard drive with copies of the boot configuration. You'll want to clean them up once in a while.
Manual
To manually restore the interfaces, do this (MAKE A BACKUP FIRST):
- Write down the new MAC addresses of every interface. You can see them in the VirtualBox's interface, with various system information commands, etc.
- Edit the file
/config/config.boot. Locate theinterfacessection, it is usually at the top. - Under the
interfacessection you can see the interfaces, both old and new, and their addresses.- If the old interface names are intact, just replace the old MAC addresses with the new addresses you wrote down. Sometimes you can copy them from the new interfaces (but beware, they might not be in the same order!).
- If the old interface names have been replaced (like eth0 has changed to eth4), change the numbers back and replace the MAC addresses.
- If the new interfaces have their own sections at the end of the
interfacessection, delete them. - Save the file and reboot.
The old interfaces should be working again.
INIT: Id "TO" respawning too fast: disabled for 5 minutes
According to VyOS's bug tracker, this problem should go away in version 1.2, but if you're using an older version (or even Vyatta Core!), then read on.
This annoying error message will pop up every five minutes or so unless you disable it. It is related to the serial console and unless you need serial console, you can safely disable it. To do this, enter the configuration mode and type:
delete system console
Commit and save the changes. You may need to reboot the machine. You will receive a message "Warning: Access to system console is unconfigured", but you can ignore this.
(Another way is to give the VM a serial port. One is enough and you don't have to "connect" it to anything. You can do this if you don't want to delete the system console setting.)
Changing the keyboard layout
(You can skip this section if you use/like the EN-US keyboard layout.)
Most Linux distributions ask during the installation which keyboard layout the user wants to use. VyOS does not; they always use the EN-US layout by default. While this is fine for 99% of the time, it makes hard to type certain special symbols (like ?, |, / and so on). It can also pose a hazard when typing passwords, in case the password contains special symbols. You might not even realize this and if you later try to SSH into the router, you might have hard time understanding why it doesn't accept your password (because the SSH connection uses your local keyboard layout which most likely is different and the symbols you enter are therefore different).
Therefore, unless you want to use the default keyboard layout, you should change it. To change the layout, type this in the non-configuration mode:
sudo dpkg-reconfigure keyboard-configuration
This opens the keyboard configurator. Most likely you want to select the "Generic 105-key (Intl) PC", but see first if your keyboard is on the list. Then select the layout you want. You'll get further questions about the layout, so keep selecting the ones you want.
As an example, I'm going to choose the Finnish keyboard layout (since I live in Finland). To do so, I have to choose these items, in this order, from the lists:
- Generic 105-key (Intl) PC
- Other
- Finland
- Finland - Classic
- The default for the keyboard layout
- No compose key
When you're done, restart the router to make the changes take effect. If your local language has special accented letters and such, you might not be able to use them even after changing the layout. But the special symbols (?, /, | and so on) should be now normally accessible.
Miscellaneous tips
SSH access
To enable SSH access, type this in the configuration mode:
set service ssh
Timezone
If your timezone is not UTC and you'd like VyOS to use your local time, you can change the timezone with this command:
set system time-zone <timezone name>
If you don't know your timezone name, press Tab and let VyOS show you the choices. Yes, Tab works everywhere for completion.
Adding more loopback interfaces
Since version 1.1.0 (Helium) VyOS has supported dummy interfaces, which essentially duplicate loopback interface functionality. They're really easy to create (N is the interface number; it can be between 0 and 999):
set interfaces dummy dum<N> ...
VyOS wiki entry for this: http://vyos.net/wiki/Dummy_interfaces.
VirtualBox: More than four network interfaces
VirtualBox exposes only four network interfaces in its GUI. However, you can add and configure more interfaces through the command line. Shut down the target virtual machine. Then use these commands (N is the interface number):
vboxmanage modifyvm <uuid|machine name> --nic<N> none|nat|null|bridged|intnet
vboxmanage modifyvm <uuid|machine name> --cableconnected<N> on|off
vboxmanage modifyvm <uuid|machine name> --intnet<N> <name>
vboxmanage modifyvm <uuid|machine name> --bridgeadapter<N> <name>
These commands are documented thoroughly in the VirtualBox's documentation. See chapter 8, "VBoxManage".
Then start up the router again, and configure the new interfaces normally.